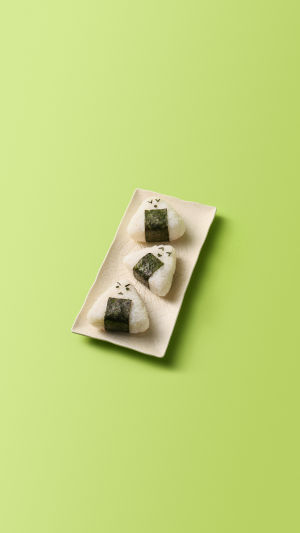
If you’re looking for an easy yet fulfilling Japanese food experience, onigiri is your answer. Onigiri, or Japanese rice balls, have been a staple in Japanese cuisine for centuries, offering a delightful blend of flavor, creativity, and tradition.
With its portable, bite-sized design, onigiri serves as a convenient snack, a fun meal, and an artistic way to enjoy rice and fillings of your choice.
But don’t mistake it for a simple ball of rice! Onigiri brings together rice, salt, and carefully selected fillings to create a harmony of flavors in every bite.
<h3>A Brief History of Onigiri</h3>
Onigiri’s origins stretch back over 2,000 years, making it one of Japan’s oldest foods. Ancient records show that samurai often carried these rice balls as a practical, portable meal. Unlike sushi, which includes seasoned rice, onigiri uses plain, salted rice, allowing the natural taste of the filling to take center stage. It’s an art form of its own, not only for its flavors but also because of its unique triangular shape and traditional wrapping with nori (seaweed).
<h3>What Makes Onigiri So Special?</h3>
The appeal of onigiri lies in its versatility. From classic fillings like umeboshi (pickled plum) and salmon to modern twists featuring tuna mayo or teriyaki chicken, there’s an onigiri for every palate. Whether you like sweet, savory, or something with a hint of spice, onigiri can be personalized to your taste. Plus, the combination of textures—from the soft rice to the crispy seaweed—makes each bite a delightful experience.
5 mins each 🍙 6 Easy Onigiri recipes for beginners! Japanese Rice ball
Video by Yuka in Tokyo
<h3>How to Make Classic Onigiri</h3>
While there are many variations, making traditional onigiri at home is easy. Here’s a simple recipe to try:
<b>Ingredients:</b>
- 2 cups short-grain Japanese rice
- Salt, to taste
- Nori seaweed sheets (optional for wrapping)
- Filling of choice (like salted salmon, pickled plum, or tuna mayo)
<b>Instructions:</b>
<b>1. Cook the Rice:</b> Rinse the rice until the water runs clear. Cook according to package instructions, and let it cool slightly after cooking.
<b>2. Prepare the Filling:</b> Choose your favorite filling—salted salmon, pickled plum, or tuna mayo are popular choices.
<b>3. Shape the Onigiri:</b> Wet your hands and sprinkle them with a bit of salt. Take a handful of rice, create a small indent in the center, and add your filling. Gently mold the rice into a triangle or oval shape, enclosing the filling inside.
<b>4. Wrap with Nori (Optional):</b> Add a strip of nori to the bottom for added flavor and ease of handling.
<h3>Onigiri Tips and Tricks</h3>
<b>- Use Fresh Ingredients</b>: Since onigiri is typically made without preservatives, it’s best to eat it fresh.
<b>- Experiment with Fillings</b>: Try mixing various fillings, like miso paste with sesame seeds or avocado and smoked salmon, to find unique combinations.
<b>- Get Creative with Shapes</b>: Although triangular is the classic shape, some onigiri are round, cylindrical, or even molded into fun shapes for bento lunches!
<h3>Why You Should Try Onigiri</h3>
Making onigiri is a delightful, hands-on experience that connects you with Japanese culinary traditions. It’s an affordable, versatile, and tasty way to explore Japanese flavors, and the simple ingredients make it easy to prepare at home. Whether you’re hosting a gathering or packing a picnic, onigiri adds a touch of culture and fun to any meal.
So, why not grab some rice and give it a try? Making onigiri at home is a chance to enjoy a beloved Japanese tradition and introduce your taste buds to something uniquely delicious.


